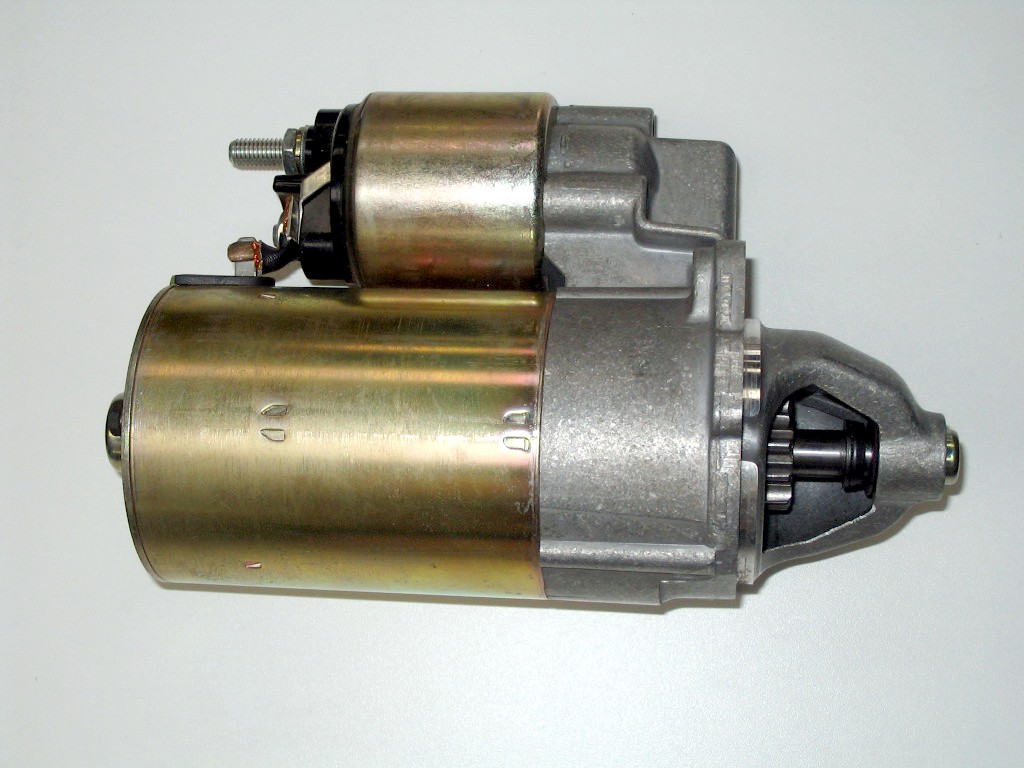
This week a vehicle was towed into our shop. The primary complaint being that when you went to turn the key and start it, the engine would not crank and would instead make a high pitched "whirring" sound. Most often when this is seen, the main problem is the starter itself malfunctioning. Normally, when you turn the key, a gear slides into contact with the flywheel, which is attached to both the Engine and Transmission. Once the gear is in place the starter spins the flywheel, allowing the engine to start. Sometimes the gear fails to engage the flywheel and spins in place, which also results in the engine not starting.
In this particular case, the teeth on both the starter and flywheel were worn, and a few were missing. Beyond the missing teeth, most of the others on the flywheel and the teeth on the starter were worn to such an extent that they were not contacting each other. As you can see in the following photographs, there are several spots that are damaged on the flywheel. The only solution is to replace the flywheel and starter, and in order to do that you have to partially remove the transmission to gain access to the flywheel.
As you can see, the left side of these teeth are worn
Another area of the flywheel showing the damage on the left side (this is also the side that faces the front of the vehicle and the direction from which the starter engages)
Every once in a while we will get a car that comes into Bryant Automotive with a mysterious electrical problem. We'll run our normal diagnostics, and find the circuit that the problem is in. The difficulty comes in finding exactly where the damage has occurred. Luckily, today's engine compartment guest has as far as we know, not damaged any wiring. But our most recent encounter with a mouse in the engine compartment led to thousands of dollars of repairs being necessary to replace the wiring loom that the mouse or rat had chewed through.
**Warning** The following are photographs of a dead mouse/rat.
This rotor was damaged by continuing to drive the truck well past when the brake pads had worn completely through.
In this photo you can see what remains of the outer portion of the brake rotor. The fins you see are usually sandwiched between the two rotor surfaces and serve as a cooling feature.
A Close up view of the rotor, the thin metal between each fin is what remains of the outer portion of the rotor
The drivers side rotor showing what normal wear on a rotor looks like.
Brand New rotor
Although difficult to see, this is a view of both the inner and outer surfaces of the rotor, as well as the fins between them.
Here at
Bryants Automotive we do all kinds of work on cars, trucks and vans.
Lately we have had many vehicles come in with cooling system problems. A
typical complaint from customers is that the vehicle is overheating.
The customer has noticed this either from the heat gauge on the dash,
steam rolling from under the hood.
Initially
we sign up customers vehicles for a cooling system inspection. This
gives the technician the time to look the entire cooling system over.
The technician starts by checking the coolant level when the vehicle has
come in and its level of protection (freezing and boiling point). The
technician then pressure tests the system to check for leaks. Leaks can
be found coming from the water pump, bypass hoses, head gasket, radiator
hoses, heater hoses, engine freeze plugs, thermostat housing, and
radiator.
This
week we had a vehicle come in with an overheating problem. Sometimes
vehicles can have more than one problem that is contributing to
overheating. On this particular vehicle the technician pressure tested
the vehicles cooling system and found a crack in the radiator. After replacing the
radiator and filling with coolant he checked the
temperature of the coolant as it worked its way through the cooling
system.
He
discovered that the coolant was not changing temperature. Typically
when the coolant leaves the engine on its way to the radiator it is hot,
cools off in the radiator and makes its return trip back through the
engine. He deduced that one of two things was happening.That the
thermostat was stuck closed (a thermostat stops coolant from flowing
until reaching optimum working temperature for the motor where it then
opens to let coolant freely pass through the cooling system). Or that the water pump was not working correctly. He
replaced the thermostat and was still having the coolant flow problem.
The next step was to remove the water pump and inspect the impeller. Essentially the
impeller pushes the coolant through the cooling system. The water pump
is driven (turned) by the car engine with the serpentine belt in this case. Below is a short video that shows
the water pump and impeller.
The impeller is NOT
supposed to separate from the water pump. With this vehicle the water pump was turning and the impeller was separated from the
water pump and not able to do its job. Which is to push coolant through the cooling
system.
After
replacing the water pump and filling with coolant we test drove the
vehicle. The new water pump is doing its job in the cooling system and
the vehicle no longer overheats.
This
is a not-so-short description of one cars journey getting fixed here at
Bryant Automotive. I hope you are a little more knowledgeable about how
your cooling system works on your vehicle.